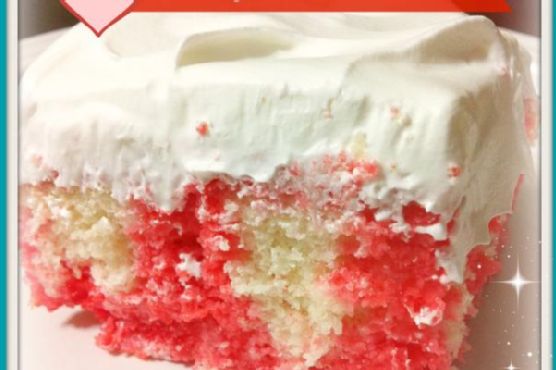
Cherry Jello Poke Cake
- Prepare the Cake:
- Bake the boxed cake mix according to the package directions. Once baked, allow the cake to cool slightly in the pan.
- Poke Holes:
- Using a fork or skewer, poke holes all over the surface of the warm cake. Make sure the holes are evenly spaced and go down to the bottom of the cake.
- Prepare the Jello:
- In a separate bowl, prepare the Jello according to the package instructions.
- Pour the Jello:
- Carefully pour the prepared Jello over the cake, ensuring that it seeps into the holes for maximum flavor absorption.
- Chill the Cake:
- Place the cake in the refrigerator for a few hours to allow the Jello to set. For best results, let it chill overnight.
- Add Topping:
- Just before serving, spread a layer of Cool Whip evenly over the top of the cake for a delicious finish.
- Serve and Enjoy:
- Slice the cake and enjoy this refreshing dessert!
Reviews
Ingredients:
Adjust Servings
| 1box cake mix white, (plus what you'll need to make it: eggs, water, oil) | |
| 3ounce cherry jello | |
| 1container cool whip |
Directions
1.
Prepare the Cake
Bake the boxed cake mix according to the package directions. Once baked, allow the cake to cool slightly in the pan.
Mark as complete
2.
Poke Holes
Using a fork or skewer, poke holes all over the surface of the warm cake. Make sure the holes are evenly spaced and go down to the bottom of the cake.
Mark as complete
3.
Prepare the Jello
In a separate bowl, prepare the Jello according to the package instructions.
Mark as complete
4.
Pour the Jello
Carefully pour the prepared Jello over the cake, ensuring that it seeps into the holes for maximum flavor absorption.
Mark as complete
5.
Chill the Cake
Place the cake in the refrigerator for a few hours to allow the Jello to set. For best results, let it chill overnight.
Mark as complete
6.
Add Topping
Just before serving, spread a layer of Cool Whip evenly over the top of the cake for a delicious finish.
Mark as complete
7.
Serve and Enjoy
Slice the cake and enjoy this refreshing dessert!
Mark as complete
Recipe content adapted from Foodista, modified and licensed under CC BY 3.0.


Share Your Thoughts